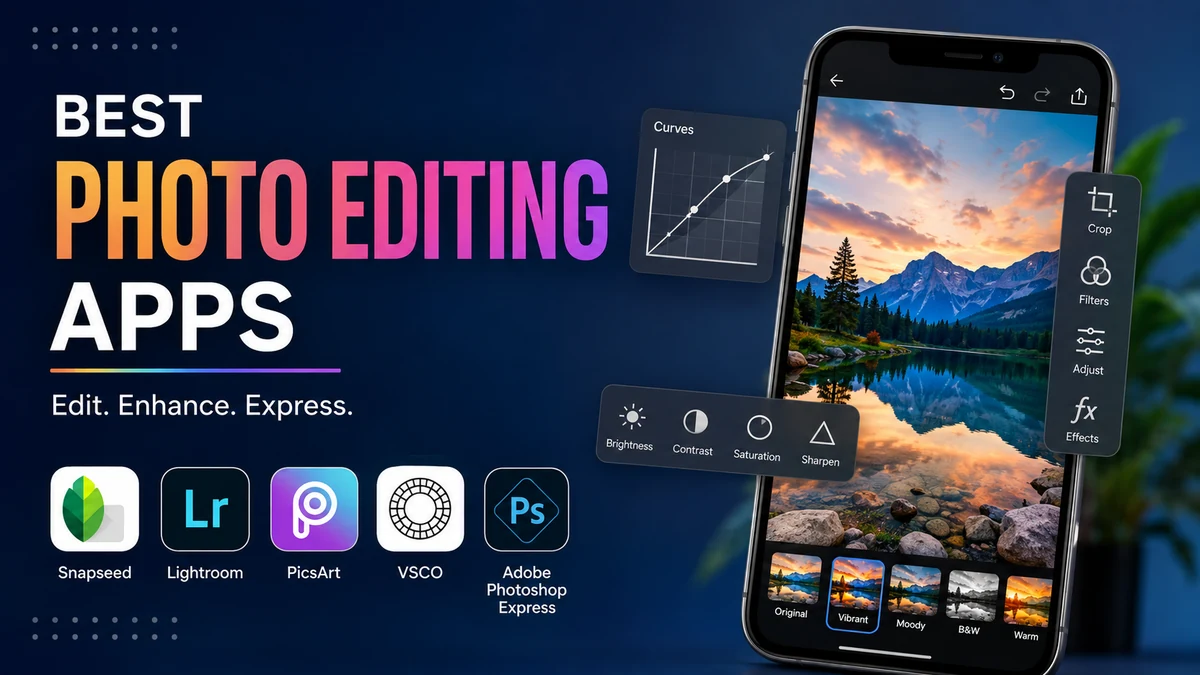
A phone can capture an impressive photograph in seconds, but the camera rarely delivers the finished image exactly as you imagined it. Exposure may be slightly off, distracting objects can creep into the frame, skin tones may look unnatural, or the composition simply needs a tighter crop.
Modern photo editing apps solve those problems without requiring a desktop computer. The strongest apps now combine traditional controls such as exposure, curves, color correction, cropping, RAW processing, and selective adjustments with AI-powered masking, background removal, object cleanup, and generative editing.
Quick answer: Photo editing apps are mobile, desktop, or browser-based tools used to improve, correct, retouch, organize, or creatively transform digital photographs. Leading options include Adobe Lightroom, Snapseed, Photoshop, VSCO, Canva, Picsart, Photomator, Darkroom, Google Photos, Apple Photos, PhotoRoom, and Pixlr, with each emphasizing a different editing workflow.
What Are photo editing apps?
Photo editing apps are software applications that let you modify digital images after they have been captured.
At the simplest level, they can straighten a horizon, crop a photograph, brighten shadows, correct white balance, or apply a filter. More capable editors can process RAW files, create masks, adjust individual colors, work with layers, remove objects, replace backgrounds, retouch portraits, and synchronize edits between devices.
The distinction between a basic photo editor and professional editing software has also become less obvious.
A few years ago, masking, curves, sophisticated object removal, and layered compositing were primarily desktop features. In 2026, many of these tools are available directly on iPhone and Android devices. Adobe, for example, offers Lightroom’s AI-assisted masking and Generative Remove on mobile, while Photoshop on iPhone and Android supports selections, layers, retouching, Generative Fill, and Generative Expand.
That doesn’t mean every app is interchangeable. The best choice depends heavily on what you want to accomplish.
The Main Types of Photo Editing Apps
It helps to separate photo editors into a few broad categories before comparing individual apps.
General-purpose photo editors
These cover the tasks most photographers need regularly:
- Exposure and contrast correction
- Highlights and shadows
- White balance
- Saturation and vibrance
- Cropping and rotation
- Sharpening
- Noise reduction
- Color adjustments
- Presets or filters
Adobe Lightroom and Snapseed are strong examples.
Advanced image editors
These go beyond developing a photograph and allow substantial image manipulation.
Typical features include:
- Layers
- Layer masks
- Complex selections
- Compositing
- Clone tools
- Generative Fill
- Background replacement
- Text and graphic elements
Photoshop fits this category. Adobe’s current mobile version includes layers, object selection, clone stamping, generative fill, generative expand, and multiple tonal adjustment tools on iPhone and Android. Some features still differ between the two platforms.
Filter and aesthetic editors
Apps such as VSCO focus strongly on creating a particular visual style.
Instead of spending several minutes manually balancing individual color channels, you can begin with a preset inspired by film or another aesthetic and then refine the result.
These apps are particularly useful when visual consistency matters across a collection of photographs.
Social and graphic-design editors
Sometimes the photograph is only one element of the finished image.
Canva and Picsart combine photography tools with features such as templates, text, stickers, cutouts, backgrounds, collages, and social-media layouts.
They make more sense than a traditional RAW editor when you’re producing Instagram posts, thumbnails, advertisements, invitations, or promotional graphics.
AI-focused editors
AI is increasingly integrated into ordinary editing apps rather than existing as a completely separate category.
Current AI tools can:
- Detect people or subjects
- Select a sky automatically
- Remove unwanted objects
- Replace backgrounds
- Retouch blemishes
- Blur backgrounds
- Extend an image beyond its original boundaries
- Generate or replace selected content
The important question isn’t simply whether an app has “AI.” It is whether its AI tools solve a problem you actually encounter.
Best photo editing apps at a Glance
There isn’t one universal editor that is best for every photograph.
| App | Particularly Useful For | Key Strength |
|---|---|---|
| Adobe Lightroom | Photography workflows | RAW editing, masks, color control |
| Snapseed | Free mobile editing | Powerful manual controls without a complex subscription setup |
| Adobe Photoshop | Advanced image manipulation | Layers, selections, retouching and generative tools |
| VSCO | Stylized photography | Presets and film-inspired looks |
| Canva | Social graphics | Templates, text and image editing together |
| Picsart | Creative mobile edits | Collages, cutouts, effects and AI tools |
| Photomator | Apple-focused photography | Non-destructive photo adjustments and Apple integration |
| Darkroom | Fast Apple-centric editing | Efficient library-based workflow and color tools |
| Google Photos | Everyday corrections | Convenient editing inside a photo library |
| Apple Photos | iPhone and Mac users | Built-in editing with tight system integration |
| PhotoRoom | Product images | Background removal and product-photo workflows |
| Pixlr | Quick browser/mobile edits | Accessible image editing without a heavyweight desktop workflow |
The right choice depends less on rankings and more on your files, devices, editing style, and desired output.
Adobe Lightroom: Strong All-Round Editing for Photographers
Adobe Lightroom remains one of the most complete options when your priority is photography rather than graphic design.
It is particularly useful when you want to control exposure and color precisely while keeping the editing process relatively clean.
Lightroom supports selective adjustments through masks. For example, you can isolate a subject, sky, or background before changing exposure, color, contrast, or other properties. Adobe also provides manual Brush, Linear Gradient, Radial Gradient, Color Range, and Luminance Range masking tools on mobile.
That matters because global adjustments have limits.
Suppose a portrait has a properly exposed face but an overly bright sky. Decreasing exposure across the entire picture may fix the sky while making the face too dark.
A mask lets you treat them separately.
Lightroom also includes Generative Remove, powered by Adobe Firefly. It can analyze surrounding image information and replace unwanted objects or distractions with generated content. Adobe lists examples including signs, people, wires, and other background distractions.
Lightroom works especially well for:
- RAW photography
- Travel photography
- Portraits
- Landscapes
- Selective adjustments
- Color grading
- Preset-based workflows
- Editing the same photographs across multiple devices
Its biggest drawback is that some of the more advanced functionality requires a paid membership. Adobe specifically identifies Generative Remove on Lightroom mobile as a premium feature.
Quick Takeaway: Choose Lightroom when you care about photographic control, RAW processing, selective adjustments, and a workflow that can grow with your skills.
Snapseed: A Powerful Free Mobile Editor
Snapseed remains unusual because it provides a substantial set of editing controls without forcing the user into the kind of subscription structure found in many competing editors.
Recent 2026 comparisons continue to place it among the leading free mobile photo editors, with support for both Android and iOS.
Its appeal is control.
Instead of limiting you to filters, Snapseed lets you work with tools for tonal adjustments, local corrections, details, perspective, healing, curves, and other photographic changes.
It can therefore serve two different users.
A beginner can open a photograph, make a few simple corrections, and export it.
A more experienced photographer can spend considerably longer refining different parts of the image.
When Snapseed makes sense
Consider it when you want:
- Free photo editing
- Manual controls
- RAW support
- Selective adjustments
- Healing tools
- Presets and creative effects
- An editor that works well for ordinary smartphone photography
The interface can initially feel less obvious than a one-tap filter app. That’s the trade-off for having more editing controls.
For someone learning mobile photo editing, however, that complexity can actually be useful because it encourages understanding exposure, contrast, color, curves, and local adjustments rather than relying exclusively on automatic effects.
Photoshop: Better When You Need to Change the Image Itself
Lightroom and Photoshop overlap, but their strengths are different.
A useful way to think about them is:
Lightroom develops photographs. Photoshop manipulates images.
That distinction isn’t absolute, especially as their features converge, but it remains helpful.
Photoshop becomes particularly useful when you need to combine images, work with independent layers, make detailed selections, replace elements, or substantially restructure the original picture.
Adobe’s current Photoshop mobile apps support multiple selection methods, layers and masks, Spot Heal, Clone Stamp, Remove, color adjustments, and generative tools. Generative Fill and Generative Expand are available on both iPhone and Android, although Adobe notes that some other tools differ between the platforms.
The mobile app is also available free to start on iPhone and Android.
Lightroom vs. Photoshop
| Need | Better Starting Point |
| Fix exposure | Lightroom |
| Edit RAW photographs | Lightroom |
| Adjust a sky independently | Lightroom |
| Apply consistent color grading | Lightroom |
| Combine several images | Photoshop |
| Work extensively with layers | Photoshop |
| Complex retouching | Photoshop |
| Generative image manipulation | Photoshop |
| Photography organization/workflow | Lightroom |
Many serious photographers ultimately use both because they solve different problems.
VSCO: Best Suited to Consistent Visual Style
Not every photograph requires complex masking or retouching.
Sometimes the challenge is making a collection of pictures look consistent.
That’s where VSCO’s preset-driven approach makes sense.
Film-inspired presets are particularly useful for photographers and creators who want recurring colors, contrast characteristics, muted tones, faded blacks, or other recognizable styles.
The mistake people often make with filters is applying them at maximum strength.
A better workflow is:
- Correct the basic exposure first.
- Fix white balance.
- Apply the preset.
- Reduce its intensity if necessary.
- Make final exposure and color adjustments afterward.
This keeps the image from looking as if a heavy filter was simply placed over it.
VSCO is less compelling when your main requirement is detailed object removal, compositing, or a deep RAW workflow. Its strength is aesthetic consistency and fast visual styling.
Canva and Picsart: Better for Photos Used Inside Designs
Canva and Picsart occupy a slightly different part of the market.
They’re useful when your final output might include much more than the original photograph.
Think about:
- Social-media posts
- YouTube thumbnails
- Posters
- Promotional graphics
- Story layouts
- Collages
- Text overlays
- Invitations
- Simple advertisements
In these situations, a traditional photographic workflow can actually slow you down.
You might not need precise luminance masking or sophisticated RAW development. You need a photograph cut out, resized, combined with typography, and prepared at the correct dimensions for a platform.
That’s why evaluating photo editing apps only according to photographic power can be misleading. A creator building Instagram graphics has different needs from a landscape photographer processing RAW images.
Use Lightroom when the photograph itself is the project.
Use something like Canva when the photograph is an element inside a larger design.
Photomator and Darkroom: Strong Choices in Apple-Centered Workflows
Apple users have additional choices that fit closely into the iPhone, iPad, and Mac ecosystem.
Photomator is built around photo enhancement rather than Photoshop-style compositing. Its capabilities include non-destructive adjustments, masks, RAW support, LUTs, selective color tools, ML Enhance, Super Resolution, and other machine-learning-assisted functions. It integrates with Apple’s photo ecosystem and supports workflows across iPhone, iPad, and Mac.
That makes it attractive when you want more control than the standard Photos app but don’t necessarily want an Adobe-centered workflow.
Darkroom follows a similarly streamlined philosophy, with particular emphasis on efficient editing, color adjustments, and working directly with a photo library.
These tools are especially worth considering if your photographs already live primarily inside Apple’s ecosystem.
However, ecosystem compatibility matters.
If you routinely move between Android, Windows, iPhone, and a web browser, a cross-platform service such as Lightroom may prove more practical even if another app feels slightly better on a single device.
Google Photos and Apple Photos: Don’t Ignore the Editor You Already Have
Many people download specialist apps before testing the tools already built into their photo libraries.
That isn’t always necessary.
Google Photos and Apple Photos can handle a surprising amount of everyday editing.
For ordinary photographs, you often need only:
- Crop
- Rotation
- Straightening
- Exposure correction
- Contrast
- Highlight recovery
- Shadow adjustment
- White balance
- Saturation
- Basic cleanup
If that solves the problem, installing a more complicated editor adds friction rather than value.
Built-in editors are especially practical when speed matters. You can capture the photograph, fix it, and share it without moving files between applications.
Specialist photo editing apps become worthwhile once you consistently run into limitations.
PhotoRoom: Useful for Product and Background Editing
Product photography has a different set of priorities.
A portrait photographer might spend time balancing skin tones. Someone selling products online may care far more about getting a clean background quickly.
PhotoRoom has become closely associated with this type of workflow, particularly background removal and product-image preparation.
This approach can be useful for:
- Online marketplace listings
- Product catalogs
- Social-commerce images
- Profile pictures
- Promotional product graphics
- Simple branded visuals
AI background removal can save substantial manual selection work, especially when you need to process many straightforward product photographs.
However, always inspect difficult edges.
Hair, transparent materials, fur, glass, reflections, thin wires, and detailed product outlines can expose mistakes that are less obvious at thumbnail size.
Pixlr: Convenient for Quick Browser-Based Editing
A dedicated installation isn’t always necessary.
Browser-based editors such as Pixlr are useful when you’re working on a borrowed computer, Chromebook, or another device where installing desktop software is inconvenient.
This type of editor can handle common jobs such as:
- Resizing
- Cropping
- Basic retouching
- Filters
- Graphic elements
- Quick social-media preparation
A browser workflow probably won’t replace a carefully managed Lightroom catalog or a full professional Photoshop workflow, but that isn’t its purpose.
Its strength is accessibility.
What Features Actually Matter in Photo Editing Apps?
Feature lists can become enormous, particularly now that practically every developer mentions AI.
Focus on the functions that affect everyday editing.
1. Exposure and tonal controls
At minimum, a useful photo editor should give you meaningful control over:
- Exposure
- Contrast
- Highlights
- Shadows
- Whites
- Blacks
These determine how bright and dark areas of a photograph are rendered.
2. White balance and color correction
White balance controls whether an image feels too warm, cool, green, or magenta.
More advanced editors may also provide:
- HSL controls
- Selective color
- Color grading
- Curves
- Vibrance
- Saturation
HSL generally refers to hue, saturation, and luminance. Being able to manipulate these separately is far more precise than simply pushing a global saturation slider.
3. RAW support
A RAW file contains considerably more original camera information than a finished JPEG.
That extra information can give you greater flexibility when recovering highlights, lifting shadows, correcting white balance, or making substantial tonal changes.
RAW support matters most for:
- DSLR and mirrorless photographers
- Serious mobile photographers
- Difficult lighting conditions
- Images requiring significant correction
For casual screenshots and social-media photographs, it may be irrelevant.
4. Selective editing and masking
Selective editing lets you change one region without affecting the rest.
For example:
- Brighten a face without brightening the sky.
- Darken a background without changing the subject.
- Increase saturation only in foliage.
- Reduce exposure in a bright window.
AI-assisted masks make these operations much faster. Lightroom, for instance, can automatically identify subjects, skies, and backgrounds before letting you refine the mask manually.
5. Non-destructive editing
Non-destructive editing preserves your original image data while storing adjustments separately.
This is one of the most valuable features for serious work.
If you decide tomorrow that yesterday’s color grade was too warm, you can reopen the image and change the adjustment rather than trying to repair an already altered file.
6. Healing and object removal
Traditional healing tools copy or synthesize nearby pixels to conceal distractions.
Generative tools take this further by interpreting the surrounding image.
Adobe’s Generative Remove, for example, analyzes the surrounding area and generates replacement content after the unwanted element is selected.
These tools work impressively on many scenes but aren’t infallible.
Zoom in afterward and check:
- Repeating textures
- Warped straight lines
- Strange fingers or limbs
- Broken reflections
- Duplicated background details
- Unrealistic shadows
AI can produce something visually plausible without producing something physically accurate.
7. Export quality
A beautiful edit is useless if the exported file is unnecessarily compressed.
Check whether an app allows control over:
- File format
- JPEG quality
- Image dimensions
- Resolution
- Color space
- Metadata
This becomes particularly important for printing, client delivery, publishing, and archiving.
What Is the Best Free Photo Editing App?
For someone specifically looking for a capable free mobile editor, Snapseed remains one of the easiest recommendations.
It combines simplicity with genuinely useful manual controls and continues to be highlighted by photography publications as a leading free option for iOS and Android.
But “free” can mean several things.
An app may be:
- Completely free
- Free with advertisements
- Free with limited tools
- Free with export restrictions
- Free while charging for AI features
- Free with paid preset packs
- Free only during a trial
Always check which features are actually included rather than judging by the download button.
A free Lightroom installation, for example, can still be useful, while some advanced functionality requires membership. Adobe’s Generative Remove is one such premium mobile feature.
Are AI Photo Editors Better Than Traditional Editing?
AI makes editing faster. It doesn’t automatically make the edit better.
Consider subject masking.
Manually tracing a complicated person or animal could once take several minutes. AI can often produce a useful starting selection almost instantly.
That’s a real improvement.
The same applies to removing a small background distraction.
But AI becomes less reliable when the requested edit changes important visual information or asks the model to reconstruct something it cannot actually see.
A sensible workflow is:
Use automation for speed, then use your eyes for judgment.
Traditional skills still matter because you need to recognize when the automatic result is wrong.
Exposure, composition, color relationships, skin tones, perspective, edge quality, and visual hierarchy don’t stop mattering because a button says “AI.”
How to Edit a Photo Without Making It Look Overedited
One of the most common editing mistakes is changing every slider simply because it’s available.
Good editing often involves restraint.
Step 1: Fix the composition
Start with cropping and straightening.
Remove empty or distracting edges and check whether the horizon is level.
Don’t crop aggressively unless the image has enough resolution to support it.
Step 2: Correct white balance
Look for areas that should appear neutral.
If skin, walls, clouds, or other familiar objects have an unnatural color cast, correct temperature and tint before doing creative color work.
Step 3: Set overall brightness
Adjust exposure while paying attention to both your subject and the brightest areas of the image.
Step 4: Recover highlights and shadows
Use highlight and shadow controls carefully.
Pushing shadow recovery too far can flatten the image and expose noise.
Likewise, extreme highlight recovery can make bright regions look muddy.
Step 5: Adjust contrast
Contrast should support the subject rather than simply make the picture “pop.”
Portraits often benefit from gentler treatment than architecture or dramatic landscapes.
Step 6: Correct color
Make small saturation or vibrance adjustments.
If one color is the problem, use selective or HSL controls instead of changing the entire image.
Step 7: Apply selective edits
Now brighten a face, darken a sky, soften a background, or correct another localized issue.
This is usually more natural than forcing one global adjustment to work everywhere.
Step 8: Remove genuine distractions
Use healing, clone, or AI removal only when something actually damages the composition.
Removing every imperfection can make a photograph look sterile.
Step 9: Sharpen carefully
Sharpening can reveal detail, but excessive sharpening creates halos, rough skin, and unnatural texture.
Judge it at an appropriate zoom level.
Step 10: Compare with the original
This final check catches more bad edits than almost anything else.
After staring at a modified photograph for several minutes, your eyes adapt to it. Comparing the edit with the original reveals whether you’ve pushed contrast, saturation, skin smoothing, sharpening, or color grading too far.
Quick Takeaway: The strongest edit usually fixes the photograph’s actual problems first and applies style second.
Which Photo Editing App Is Best for Beginners?
Beginners don’t necessarily need the app with the fewest controls.
They need an editor in which actions make sense.
For straightforward smartphone editing, Snapseed provides plenty of room to learn without requiring a large investment.
Lightroom is also worthwhile for someone who wants to learn photography more seriously because its terminology translates well into professional photo workflows: exposure, highlights, shadows, curves, masks, white balance, color grading, and RAW processing.
Built-in Apple Photos or Google Photos tools are better when the main goal is speed.
Canva or Picsart makes more sense when you’re mainly creating social content rather than learning photographic post-processing.
The best beginner app is therefore the one that matches what the beginner wants to become better at.
Which App Is Best for Professional Photo Editing?
For photography-focused professional work, Lightroom remains one of the strongest choices because editing, masking, RAW development, and cross-device workflows exist within the same ecosystem.
For detailed retouching or image manipulation, Photoshop adds deeper control through layers, selections, compositing, and generative editing.
Professional photographers often use these applications together rather than choosing between them.
Other workflows can be equally valid.
A photographer deeply invested in Apple hardware may prefer Photomator or Darkroom for part of the process. Studio photographers may rely on different desktop tools entirely.
“Professional” isn’t a feature.
The requirements define the software:
- How many images do you process?
- Are they RAW?
- Do you need batch editing?
- Does work move between desktop and mobile?
- Do you need layers?
- Is precise color critical?
- Are clients expecting particular file formats?
- Do you need cloud synchronization?
- Is non-destructive editing essential?
Answering those questions is more useful than simply downloading the app with the longest feature list.
How Much Photo Editing Should You Do?
Editing should help communicate what the photograph is supposed to show.
That might require almost nothing.
Or it might require substantial correction.
A documentary photograph generally calls for a different approach from a fashion composite or surreal digital artwork. Similarly, cleaning dust from a product photograph is fundamentally different from replacing the product’s appearance.
This becomes increasingly important as generative AI enters ordinary editing tools.
If authenticity matters, distinguish between:
Correction: adjusting exposure, color, crop, or minor distractions.
Retouching: deliberately changing visible details.
Manipulation: adding, removing, replacing, or generating meaningful visual content.
None is inherently wrong, but they are not the same thing.
For journalism, scientific work, evidence, competitions, and other contexts where accuracy matters, editing standards may be considerably stricter than they are for personal or creative imagery.
Common Photo Editing Mistakes
Making every image extremely saturated
Strong colors initially grab attention, which makes oversaturation easy to miss while editing.
Come back to the image later and compare it with the original.
Crushing shadows for artificial contrast
Deep blacks can add drama, but valuable texture disappears quickly.
Watch clothing, hair, foliage, and dark interiors carefully.
Smoothing skin until texture disappears
Real skin has texture.
Over-aggressive beauty filters can make portraits look synthetic.
Using background blur around complicated edges
Hair, glasses, shoulders, plants, and transparent objects reveal inaccurate segmentation quickly.
Inspect the boundaries after applying automated blur.
Removing objects without checking the reconstruction
Generative removal can leave duplicated patterns or structurally strange backgrounds.
Adobe itself recommends selecting the complete object and its shadow when using Generative Remove, which helps the system produce a more convincing replacement.
Editing the JPEG repeatedly
Repeatedly saving compressed files can reduce quality.
When possible, preserve the original file and use a non-destructive workflow.
Choosing an app because it has the most AI features
A dozen AI buttons don’t necessarily produce better photographs.
If you mainly adjust exposure, crop pictures, and correct color, excellent traditional editing controls are far more valuable.
Do You Need More Than One Photo Editing App?
Often, yes.
Different editors can form a useful workflow without unnecessarily duplicating each other.
For example:
Photography workflow:
Lightroom → Photoshop → export
Free mobile workflow:
Snapseed → phone gallery → share
Social content workflow:
Lightroom or Snapseed → Canva → social platform
Product workflow:
Lightroom → PhotoRoom → marketplace listing
Apple-focused workflow:
Apple Photos → Photomator or Darkroom → export
The mistake isn’t using multiple apps.
The mistake is having six editors installed that all perform the same basic corrections while none solves a specific problem particularly well.
Choose one primary editor and add another only when you discover a recurring task your first app handles poorly.
How to Choose the Right photo editing apps
Rather than downloading whatever appears first in an app-store search, evaluate your actual workflow.
Ask yourself five questions.
What do I usually photograph?
Portraits, products, food, travel, landscapes, documents, and social content all create different editing requirements.
Do I shoot RAW or JPEG?
RAW photographers need stronger development tools. Casual JPEG shooters may never use them.
How often do I need selective adjustments?
If you regularly edit the subject and background differently, good masking should be high on your priority list.
Do I need graphics as well as photography?
If the final image regularly includes text, logos, templates, and decorative elements, Canva or Picsart may save more time than a photography-only tool.
Which devices do I use?
An excellent editor isn’t an excellent choice if it traps your workflow on a device you don’t regularly use.
Check Android, iOS, iPadOS, macOS, Windows, and browser availability according to your own setup.
What am I willing to pay for?
Don’t evaluate only the first month’s cost.
Consider the pricing model over several years.
Subscription tools can make sense when they deliver frequent updates, cloud storage, synchronization, or professional capabilities you rely on. A free or one-time-purchase app makes more sense when those services provide little value to you.
A Simple Way to Pick the Right Editor
If you want one practical starting point, use the task rather than the brand.
| Your Main Need | Start With |
| Free smartphone editing | Snapseed |
| Serious photography | Lightroom |
| Layers and detailed manipulation | Photoshop |
| Film-inspired aesthetics | VSCO |
| Social-media designs | Canva |
| Creative collages and effects | Picsart |
| Apple-focused photo workflow | Photomator or Darkroom |
| Quick built-in adjustments | Apple Photos or Google Photos |
| Product background editing | PhotoRoom |
| Browser-based quick edits | Pixlr |
There is no reason to commit permanently.
Your needs may change as your photography improves.
A person who begins with automatic filters may eventually want curves and masks. Someone who initially processes individual photographs may later need batch editing and file organization. A social-media creator may move in the opposite direction and decide speed is more valuable than granular control.
Final Thoughts on photo editing apps
The most useful photo editing apps are not necessarily those with the longest feature lists or the largest number of AI tools. They’re the ones that remove friction between the photograph you captured and the finished image you intended to create.
Snapseed remains a compelling starting point for free mobile editing, while Lightroom offers a deeper photography workflow with RAW processing and increasingly sophisticated masking and AI-assisted tools. Photoshop is better suited to layered manipulation and detailed retouching, while VSCO focuses on visual style. Canva, Picsart, PhotoRoom, Photomator, Darkroom, Google Photos, Apple Photos, and Pixlr each solve different parts of the editing problem.
Start with the simplest editor that covers the work you actually do. Learn exposure, white balance, composition, color, and selective editing before chasing every new automated feature. Once those fundamentals make sense, AI becomes what it should be: a faster tool in the workflow rather than a substitute for photographic judgment.